
In our previous post on NGModelController, we had a look at the way that it all hangs together and worked through a quick example of building our own custom directives with powerful data transformations. In this second post in the series, we will look at how we can apply validation to our directives.
Parsers: bigger than they look
Parsers have two purposes:
- to convert the
$viewValuethat is represented in the browser into the underlying value. We saw this in the our previous post on NGModelController. - to sanitise or validate the
$viewValue- so we can apply validation in the view layer.
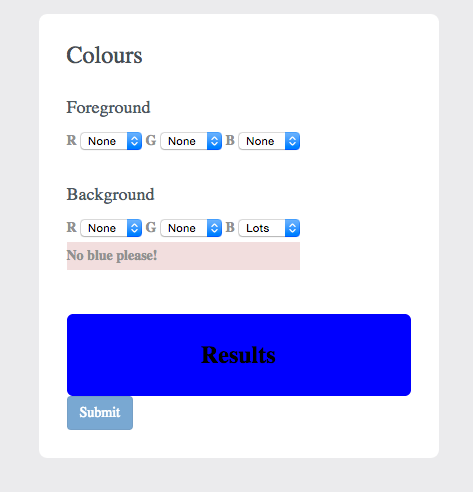
It is this second purpose we are going to look at here: adding validation that asserts that blue is not a valid colour selection for our directive. You can view the example code on JSFiddle.
Adding validation
Again, we are developing our example from part 1 a little bit further. Let's modify the HTML:
<div ng-app="RadifyExample" class="container" ng-controller="ColourPickerController">
  <form name="myform">
    <h1>Colours</h1>
    <label>
        <h2>Foreground</h2>
        <colour-picker ng-model="foreground"></colour-picker>
        <p ng-show='myform.$error.foreground_badColour' class="bg-danger">No blue please!</p>
    </label>
    <label>
        <h2>Background</h2>
        <colour-picker ng-model="background"></colour-picker>
        <p ng-show='myform.$error.background_badColour' class="bg-danger">No blue please!</p>
    </label>

    <div ng-style="{'background': background, 'color': foreground }" class="results">
        Results
    </div>
    <div>
        <button ng-disabled="myform.$invalid" ng-click="test()" class="btn btn-primary">Submit</button>
    </div>
  </form>
</div>
Notice that we've:
- Created a
<form> - Added
<p>paragraphs that say "No blue please!" - Added a button that is disabled if the form is invalid
Now, let's add something to the controller:
.controller('ColourPickerController', function($scope) {
    $scope.background = 'F00';
    $scope.foreground = '000';

    angular.extend($scope, {
        test: function() {
            alert("Submitted!");
        }
    });
})
All this does is alerts "Submitted!", so we can easily see whether the button has been disabled or not.
Because parsers are a chain, we can have as many as we like, so we are going to insert a new one. We are not transforming the value in this parser (the first purpose of parsers); instead, all we are doing is the second purpose - validating the view value. Therefore, we are going to insert it BEFORE the current parser in our code:
// add validation
ngModelCtrl.$parsers.push(function(viewValue) {
  var blueSelected = (viewValue.red === "0"
      && viewValue.green === "0"
      && viewValue.blue === "F");

  ngModelCtrl.$setValidity(
      iAttrs.ngModel + '_badColour',
      !blueSelected
  );

  return viewValue;
});

ngModelCtrl.$parsers.push(function(viewValue) {
  return "#" + [viewValue.red, viewValue.green, viewValue.blue].join('');
});
Now, if you select blue for either of the colours, the button should be disabled and you should see a warning.
How does this work?
As we noted, we can have as many parsers as we like. We could do all the transformation and validation in a single parser function, but splitting it up into individual validation rules and transformations makes things a bit more modular and composable.
So, this gives us the validation - which sets myform.$invalid. Because the directives are bound to model values inside myform, if validation fails in either of them, myform is considered invalid. We've also added the paragraphs with the bg-danger class, which only show if there is a specific problem. It's always important to tell the user WHY you're not prepared to accept their data, otherwise you just look passive-aggressive and crazy! ;-)
Notice that we have two potential errors that can be set on the form: foreground_badColour and background_badColour:
ngModelCtrl.$setValidity(
  iAttrs.ngModel + '_badColour',
  !blueSelected
);
We use iAttrs.ngModel from the enclosing scope - which allows us to separate out the error messages so we can show the validation messages in the correct places.
What else can I do with this?
We've seen that parsers have two purposes: validation and transformation. We can apply multiple validations - as many as we like - to verify various things about our data. This is an incredibly powerful for providing rich, sophisticated controls for our data!
More on the topic
In the third and final article in our series, we will look at unit testing.
